Does Shopify have inventory management? Yes. Shopify lets you track stock for each product and variant, adjust quantities, move stock between locations, create purchase orders, run stock counts and pull inventory reports, all from the Shopify admin. You don’t need an app to get started.
What Shopify doesn’t do on its own is keep your books. Cost of goods sold, supplier bills and sales outside Shopify usually need another system. This guide covers the native tools step by step, common problems, and where growing merchants add more.
How to track inventory in Shopify
Tracking is turned on per product, or per variant for products with sizes, colors or other options.
Turn on inventory tracking
- In the Shopify admin, go to Products.
- Click the product.
- If the product has variants, click the variant you want to track.
- In the Inventory section, turn on Track quantity.
- Enter the Available count.
- Click Save.
Track anything physical you stock or reorder. Digital products, services and gift cards usually don’t need it. Unsure of exact counts? Enter an estimate and correct it after a physical count.
Decide whether to keep selling at zero
By default, customers can’t buy an item once its inventory reaches zero. If you take backorders or preorders, open Sell when out of stock in the Inventory section and choose Continue selling when out of stock. This option only appears once tracking is on.
The setting doesn’t apply to Shopify POS. Staff can still sell an item at zero or below in store, but POS warns them first.
Add SKUs and barcodes
SKUs and barcodes both sit in the Inventory section of a product or variant.
- SKU: Give every variant its own code. A shirt sold in 3 sizes and 4 colors needs 12 SKUs. Shopify warns you about duplicate SKUs, which can break integrations and tracking. Keep codes short, skip spaces and special characters, and match them exactly across apps, since SKUs are case-sensitive. A free SKU generator helps you keep one consistent format.
- Barcode: Shopify accepts UPC, EAN, GTIN, ISBN and custom formats, with up to 20 barcodes per product or variant. Shopify POS can find a product by scanning any of its barcodes or its SKU.
Understand inventory states
Shopify splits stock at each location into five states:
| State | What it means |
|---|---|
| On hand | All units at the location (Committed + Unavailable + Available) |
| Available | Units you can sell right now |
| Committed | Units set aside for unfulfilled orders, draft orders or transfers marked ready to ship |
| Unavailable | Units held back for damage, quality control, safety stock or by an app |
| Incoming | Units on the way from a transfer or purchase order, not yet sellable |
A product can show 10 on hand and only 4 available because 6 units are committed to open orders.
How to view and adjust inventory in Shopify
Adjust one item on the Inventory page
- From your Shopify admin, go to Products > Inventory.
- Select a location from the location picker.
- Click the quantity in the Available or On hand column.
- Use Set to for an exact count, or open the drop-down and choose Adjust by to add or subtract.
- Optional: Click Add reason and pick one, such as Received, Damaged, Theft or loss or Return restock.
- Click the check icon, review the pending change, then click Save.
Each change lands in your adjustment history, with the reason shown in the Activity column. Consistent reasons let you see later whether stock was lost to damage, theft or data entry mistakes.
Edit many products with the bulk editor
On Products > Inventory, select the products and variants you want, then click Edit variants to open the bulk editor. Click Columns to add fields, edit the values, and click Save.
The bulk editor sets absolute quantities without recording where stock came from or went. Use it for initial setup, not day-to-day changes.
Import and export inventory with a CSV file
For larger catalogs, CSV is faster. On Products > Inventory, click Export, choose a location (or All locations), and export the variants you need. Edit the On hand (new) column, then click Import, add the file and click Upload file.
At import, Shopify compares the On hand (current) column with live stock and skips any row that changed since export. That protects sales made while you were editing, so export a fresh file each time.
Shopify purchase orders, transfers and receiving
Shopify has native purchase orders. They record what you ordered from a supplier, at what cost and on what terms, and link to inventory transfers so incoming stock is tracked and received.
Create a purchase order
- In your Shopify admin, go to Products > Purchase orders.
- Click Create purchase order.
- Select a supplier, or click Create new supplier to add one.
- Optional: Select a destination location.
- Add products by searching, clicking Browse, importing a CSV or scanning barcodes.
- Enter the quantity for each product. You can also add a supplier SKU, cost and tax percentage.
- Review the Cost summary, then click Save as draft.
When your supplier confirms, mark the order as Ordered. Costs fill in from your last purchase order with that supplier, or from the variant’s cost per item if you haven’t ordered it before.
Receive stock against a purchase order
Once a purchase order is marked Ordered, you can create a linked inventory transfer. When the shipment arrives:
- Go to Products > Transfers.
- Click the transfer linked to the purchase order.
- Click Receive items.
- For each item, choose Accept, Reject or Cancel and enter the quantity.
- Click Save.
You can receive part of a shipment now and the rest later. Shipping, duties and other fees can be added to individual shipments, and the transfer’s Cost summary compares the agreed cost with the actual cost to receive.
The same Transfers page moves stock between your own stores and warehouses, and staff can also receive transfers in Shopify POS.
Shopify multi-location inventory
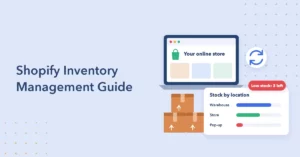
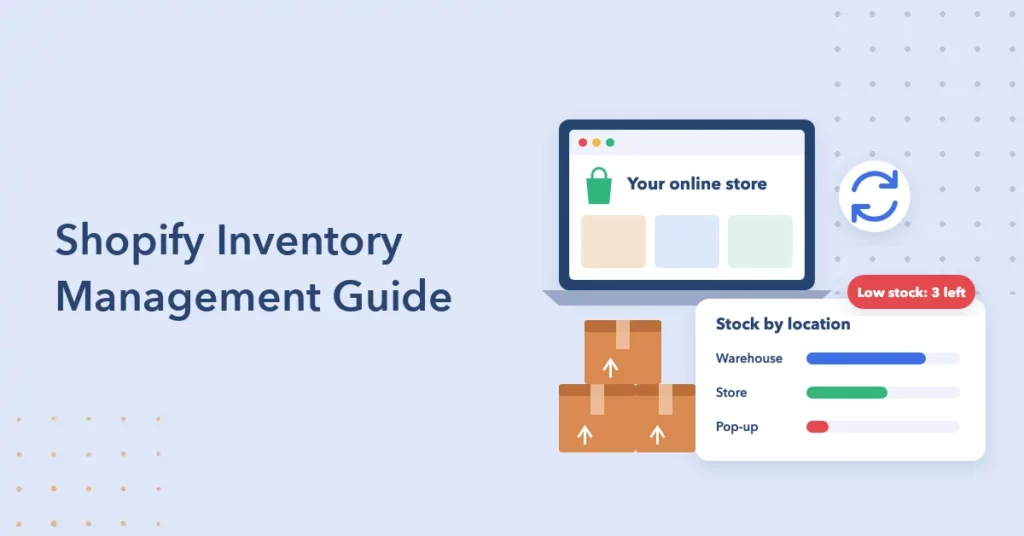
A location is any physical place where you sell products, fulfill orders or stock inventory, such as a retail store, warehouse or pop-up. Some dropshipping and third-party logistics apps also count as locations. Each location keeps its own count, and inventory isn’t pooled between them.
Add a location
- From your Shopify admin, go to Settings > Locations.
- In the All locations section, click Add location.
- Enter a name and address.
- Leave online fulfillment on if this location should ship online orders, or turn it off if it shouldn’t.
- Click Save.
Location limits by Shopify plan
| Shopify plan | Active inventory locations |
|---|---|
| Starter | 2 |
| Basic | 10 |
| Grow | 10 |
| Advanced | 10 |
| Shopify Plus | 200 |
Deactivated locations and app-based locations don’t count toward the limit.
Set fulfillment priority with order routing
When you have two or more fulfillment locations, Shopify uses order routing to decide which one ships each online order. Set it up in Settings > Shipping and delivery, then click Order routing in the Shipping section. Rules include Use ranked locations, Ship from closest location, Use preferred locations and Minimize split fulfillments.
By default, Shopify tries to fill an order from one location and splits it only when it has to. Locations aren’t ranked by distance unless you add the closest-location rule. If no location can cover an item, the highest-priority location that stocks it can oversell and go negative. In-store POS sales always draw from that store’s own stock.
Shopify inventory reports
Find inventory reports in Analytics > Reports. Click the Category filter and select Inventory. Shopify’s plans include access to its reports, and the Basic plan comes with all reports plus custom reports.
| Report | What it tells you |
|---|---|
| Month-end inventory snapshot | On-hand quantity of each variant at the end of each month |
| Month-end inventory value | Total value of on-hand stock, based on cost per item |
| Inventory sold daily by product | Average units sold per day for each variant |
| Products by percentage sold | Share of starting stock sold during a period |
| ABC product analysis | Grades variants A, B or C by revenue over the last 28 days |
| Products by sell-through rate | Percentage of total stock sold over a recent 30-day period |
| Inventory remaining per product | Estimated days each variant’s stock will last at its recent sales rate |
| Inventory adjustment changes | Every adjustment in a period, from manual edits, apps, transfers and fulfillments |
| Inventory adjustments by count | Number of adjustments by staff, location or app |
For reordering, Inventory remaining per product flags what will run out soon, and ABC product analysis shows which items matter most to revenue. Set a reorder point for each A item, and use sell-through and month-end value reports to watch inventory turnover. Value and profit reports rely on cost per item, so fill it in for every variant.
Shopify stock counts (and what happened to Stocky)
Stock counts are now built into the Shopify admin. Go to Products > Inventory, click Stock counts, then click Create count. Pick one location, add products by search or barcode scan, and save. Staff record what they find, and a manager reviews and approves the count before inventory changes. Approval applies the difference between counted and expected quantities, and it can’t be undone.
A few limits to plan around: each count covers one location, counts must be created in the admin on a desktop browser, and bundles can’t be counted. Counting in the Shopify POS app needs a POS Pro subscription at that location.
Stocky, Shopify’s older inventory app for POS merchants, was delisted from the Shopify App Store on February 2, 2026, and stopped working on August 31, 2026. Its features now live in the Shopify admin and POS, and old Stocky records don’t move over automatically.
Common Shopify inventory problems and how to avoid them
Overselling across channels
Shopify can only protect stock it knows about. If marketplace or wholesale sales don’t reach Shopify quickly, two customers can buy the last unit. Pick one system as the source of truth and connect every channel to it.
Variants that don’t line up
Stock is tracked at the variant level, so one missing SKU or untracked size throws off the whole product. Check that tracking is on and that every variant has a unique SKU, especially after importing products or adding new options.
Counts that drift
Bulk edits and quick fixes without a reason make it hard to explain why a number changed. Use Adjust by with a reason for daily changes, receive supplier stock through purchase orders and transfers, and run regular stock counts on your fastest movers.
Where native Shopify inventory management falls short
Many single-store merchants never need more than Shopify’s tools. Gaps appear as you add channels, suppliers and an accountant.
- Cost of goods sold and accounting. Shopify stores a static cost per item, and its Help Center suggests an ERP or accounting system for dynamic cost data. Working out COGS for a Shopify store and keeping books happens outside Shopify.
- Purchase orders to bills. Shopify purchase orders track what’s coming in, but they don’t become vendor bills in a general ledger. Your bookkeeper still has to record and match each supplier invoice.
- Selling beyond Shopify. Shopify’s counts only reflect the orders it sees. Amazon, WooCommerce or wholesale sales need something that updates stock from every channel.
- Payouts and fees. Shopify payouts net out fees and refunds. Matching them to your bank and sales is a separate Shopify bookkeeping job.
If you’re comparing tools, our roundup of the best inventory management software for Shopify covers the main options.
Using Vencru with Shopify
Vencru is inventory, invoicing and accounting software that connects directly to Shopify.
- Catalog and orders: Vencru imports your Shopify orders, products and catalog, including variants and locations, with up to 60 days of history.
- Stock sync: Stock changes in Vencru are pushed back to your Shopify store within minutes. Amazon and WooCommerce also connect on the Enterprise plan.
- Books that match your store: Shopify sales, fees, refunds and payouts sync into double-entry books, with payout reconciliation. COGS is calculated at average cost.
- Reordering: Set reorder points and get low-stock alerts in the app and by email.
- Purchasing: Create purchase orders, receive them in part or in full, and turn them into vendor bills (Growth plan and up).
- In-store sales: The Vencru POS sells from the same stock as your Shopify store.
See how it works on our Shopify accounting software page, or explore ecommerce inventory management in Vencru. Try Vencru free for 14 days, no credit card required.
Frequently asked questions
Does Shopify have inventory management?
Yes. Shopify includes inventory tracking by product and variant, stock adjustments with reasons, transfers between locations, purchase orders, stock counts and inventory reports. You manage them from the Products and Analytics sections of the Shopify admin.
How do I track inventory on Shopify?
Open a product in the Shopify admin, select the variant if there is one, and turn on Track quantity in the Inventory section. Enter the available count and save.
How do I get an inventory report on Shopify?
Go to Analytics > Reports, click the Category filter and select Inventory. Reports include month-end inventory snapshot and value, ABC product analysis, sell-through rate, inventory remaining per product and inventory adjustment history.
How many inventory locations can you have on Shopify?
The Starter plan allows 2 active locations. Basic, Grow and Advanced allow 10, and Shopify Plus allows 200. Deactivated locations and app-based locations don’t count toward the limit.
Does Shopify have purchase orders?
Yes. Go to Products > Purchase orders, add your supplier, products, quantities and costs, and mark it as ordered once the supplier confirms. A linked transfer lets you receive items in full or in part.
Is Shopify Stocky still available?
No. Stocky was delisted from the Shopify App Store on February 2, 2026, and stopped working on August 31, 2026. Its main features, including purchase orders, transfers, adjustments and stock counts, are now in the Shopify admin and POS.